Following requirements needs to be satisfied to follow this guide:
* eSMART series HMI
* Corvina Cloud App software (Download here)
* Superuser account for Corvina Cloud App
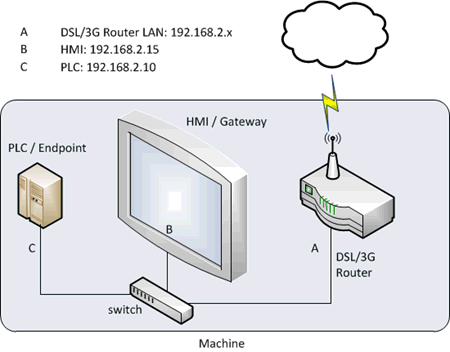
Network diagram below explain the network configuration we are going to setup on Corvina Cloud:
Steps to do:
* Creation of gateway/endpoints with Corvina Cloud App
* Cloud service setup on eSMART
* Connection to gateway/endpoints with Corvina Cloud App
Creation of gateway and endpoints with Corvina Cloud App
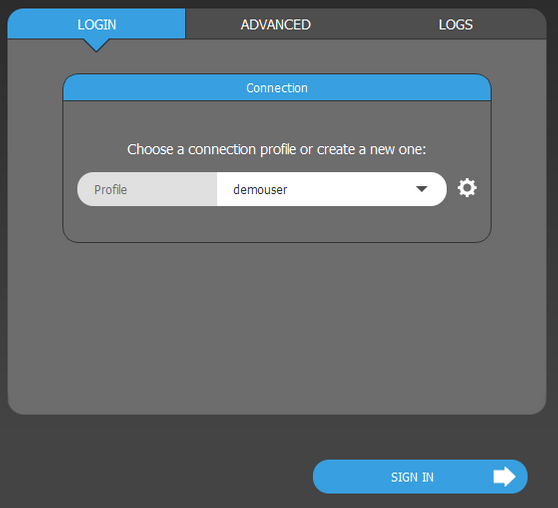
Launch the Corvina Cloud App software to get access to the Corvina Cloud server, in the login page select the profile with your credential, then click on the [SIGN IN] button.
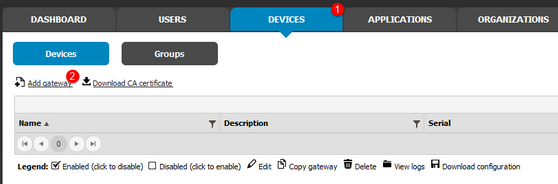
Once connected select the DEVICES tab, then click on "Add Gateway" to add a new gateway device.
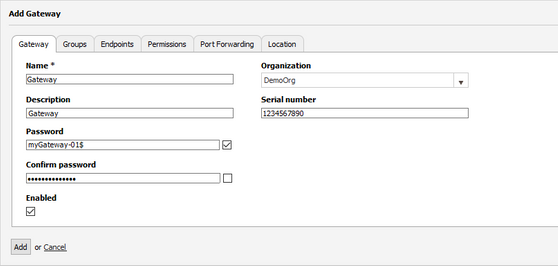
Into the Gateway definition interface define:
* Name: must be unique in users, gateways and endpoints
* Organization: select the organization from the combo-box
* Password: must be at least 8 characters and contain at least one non-alphanumeric character
* Serial number: insert the license code provided from your local reseller or the serial number of your device (license code are provided for eTop 500/600, eSmart and ex700 devices)
These settings will define the login credentials to be set into the HMI Cloud Enabler on HMI. A description may be added.
In this example the credentials are:
* Username: Gateway/DemoOrg
* Password: myGateway-01$
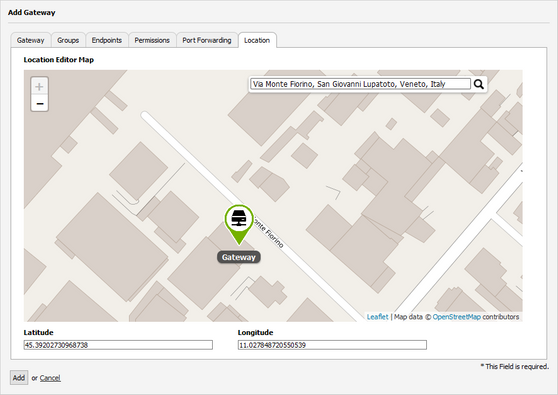
Location
In this tab it is possible to assign a location to the device using either the Location Editor Map or the two small text fields below. In the map, use the plus and minus buttons to resize the maps to your needs or use directly the text field.
Search...
In this text field, write an address and optionally also the city and country. If a match is found, an icon is positioned on the map, if more result are available, choose the most appropriate one.
Note When an address is selected, the two text fields below are automatically filled in.
It is also possible, instead of supplying the address, to give the coordinates of the device location:
Latitude
Enter in decimal form the latitude where the device is installed
Longitude
Enter in decimal form the longitude where the device is installed.
If the device is moved from its current location into a nearby one, it is possible to drag the icon to the new location: the new address and coordinates will be updated automatically.
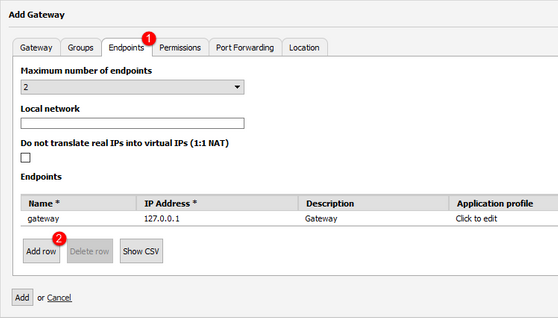
Additional Endpoints (optional)
If we are planning to connect also additional devices (e.g. HMI, PLC, etc.), select the Endpoints tab to configure and click on [Add row] button:
Fill the row with:
* Name for the Device endpoint
* The Device IP Address. In this example the Device have IP 192.168.43.112
* Device description (optional)
Click then on [Add] button to confirm and save changes to the new Gateway.
Note: Router Service must be enabled from "System Settings > Services" to be able to reach external endpoints (PLCs or any network device connected to the gateway)
Cloud service setup on eSMART
Cloud service allows to setup the Corvina Cloud connection into the operator panel. This feature is part of the firmware so can be managed using the System Settings page.
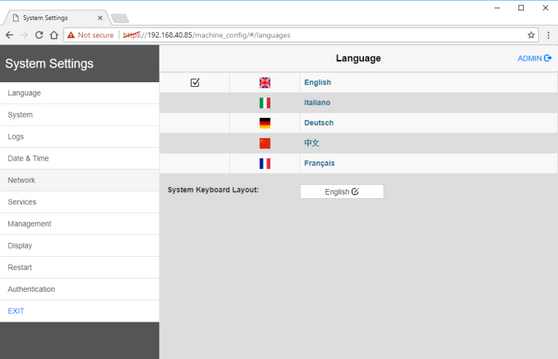
System Settings page can be retrieved:
* on the HMI screen, selecting Show System Settings option of Context Menu
* remotly using any web browser
Some browser may report a security warning, then the page can be added to the trusted sites to allow the connection.
Once the connection is established, the system will ask for a User Name and Password to get access to the Web interface, defaults are:
* User Name: admin
* Password: admin
Then the web interface will be displayed:
If required, the Network settings can be modified by click the Network item, then select the [Edit] button.
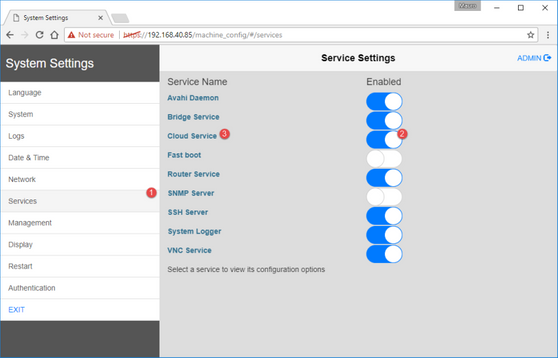
To enable and setup the Corvina Cloud connection:
1. Select the Services item,
2. Enable the Cloud Service by acting on the switch,
3. Click the Cloud Service item to open the Cloud Service settings
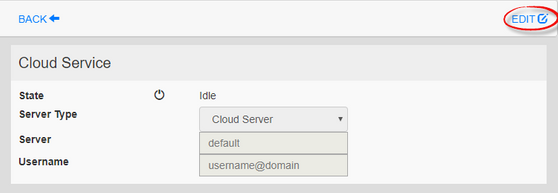
Click [Edit] to enter in edit mode:
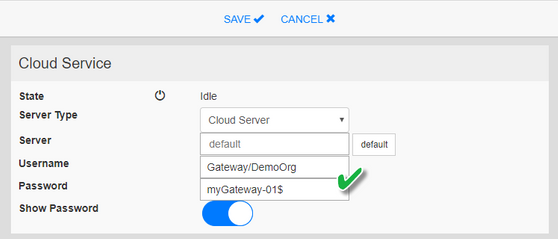
Enter the credentials previously defined for this Gateway with Corvina Cloud App.
In this example Username and Password are respectively "Gateway/DemoOrg" and "myGateway-01$"
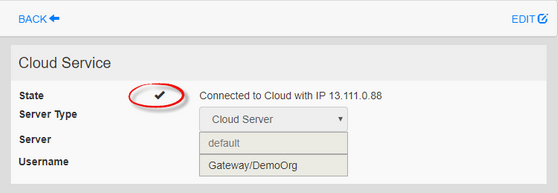
Once confirmed if the connection operation is successful a message is given from the system, and the State voice will be updated accordingly.
Connection to gateway/endpoints with Corvina Cloud App
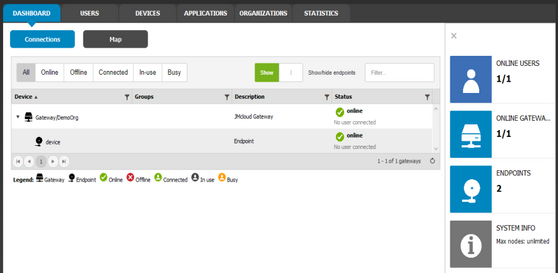
Once the gateway has been connected to the Corvina Cloud server, from Corvina Cloud App software it is possible to monitor the Endpoints defined.
Into the DASHBOARD tab will be reported Gateway and its Endpoints with proper status.
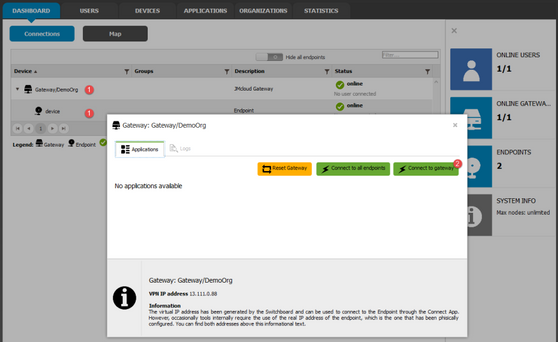
To establish the VPN tunnel with the remote device (Gateway or Endpoint),
1. Click on the Device to open the device dialog box
2. Click the Connect button
If the connection is correctly established the button will change color.
To disconnect the Endpoint click on the Disconnect button.
From the device dialog box you can retrieve the IP Address that can used from the applications to reached the remote device. The dialog will offer a list of predefined applications that can be activate with a simple click. See Applications chapter for additional details.
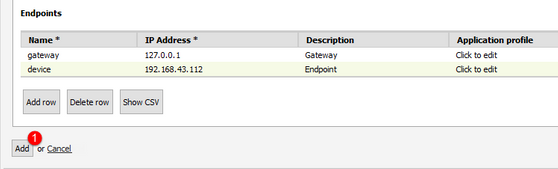
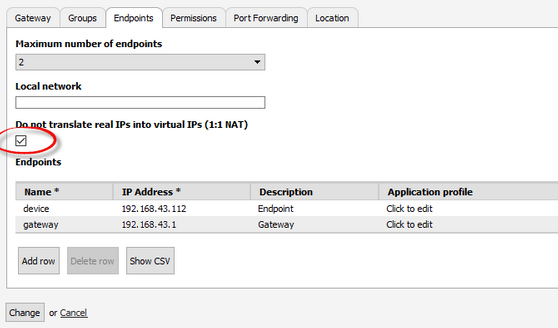
Use Real IP instead of Virtual IP (optional)
When an Endpoint is connected to the Corvina Cloud server, by default gets a Virtual IP address.
In some cases it may be necessary for the Endpoints to maintain the real IP used into the local network also when reached trough the VPN.
To allow the use of real IP also in VPN the "Do not translate real IPs into virtual IPs (1:1 NAT)" option must be configured when the Endpoint is created.
When this option is selected the real IP of the operator panel and all other Endpoints must be specified into the configuration table as shown in the image below
.


SMART AUTOMATION APS ∙ BRANSAGERVEJ 5 ∙ DK-9490 PANDRUP ∙ DENMARK ∙ PHONE +45 7734 9960 ∙ SALG@SMARTDK.COM ∙ CVR: 31769574 ∙ WWW.SMARTDK.COM